Want to learn how to record audio on a MacBook? It is easy to do if you follow the steps below, and recording audio on your MacBook from meetings or lectures for school notes will be a breeze. Your MacBook has built-in tools to help you record sound for a variety of scenarios, including music, voice notes, and with a few extra tools, even system sounds.
Read our guide to learn how to record audio on MacBook, including MacBook Air and MacBook Pro models, using both internal and external microphones.
Internal vs. External Audio Recording on Mac
Before you get started, it is important to know the difference between internal and external audio recording so you can choose the best option to fit your needs.
- Internal audio is the sound that comes from your computer, like music, online videos, or app sounds.
- External audio is sound recorded using a microphone. A mic can be a built-in one or an external mic connected to your MacBook.
Using Built-In vs. External Microphones
MacBooks have a built-in microphone that works perfectly for voice memos and the quality is fine for most recordings. If you want clearer and higher sound quality, especially for music or podcasts, it is better to use an external microphone. External microphones are more sensitive and also help reduce the background noise.
When to Record Internal/System Audio
If you want to record audio coming directly from your Mac you will need extra software. This is the case for recording things like music playing on your browser or app sounds. Recording tools like BlackHole or Audio Hijack let you route the system audio into your recording program. You will also need another tool for recording phone calls.
How to Record a Voice Memo on Mac
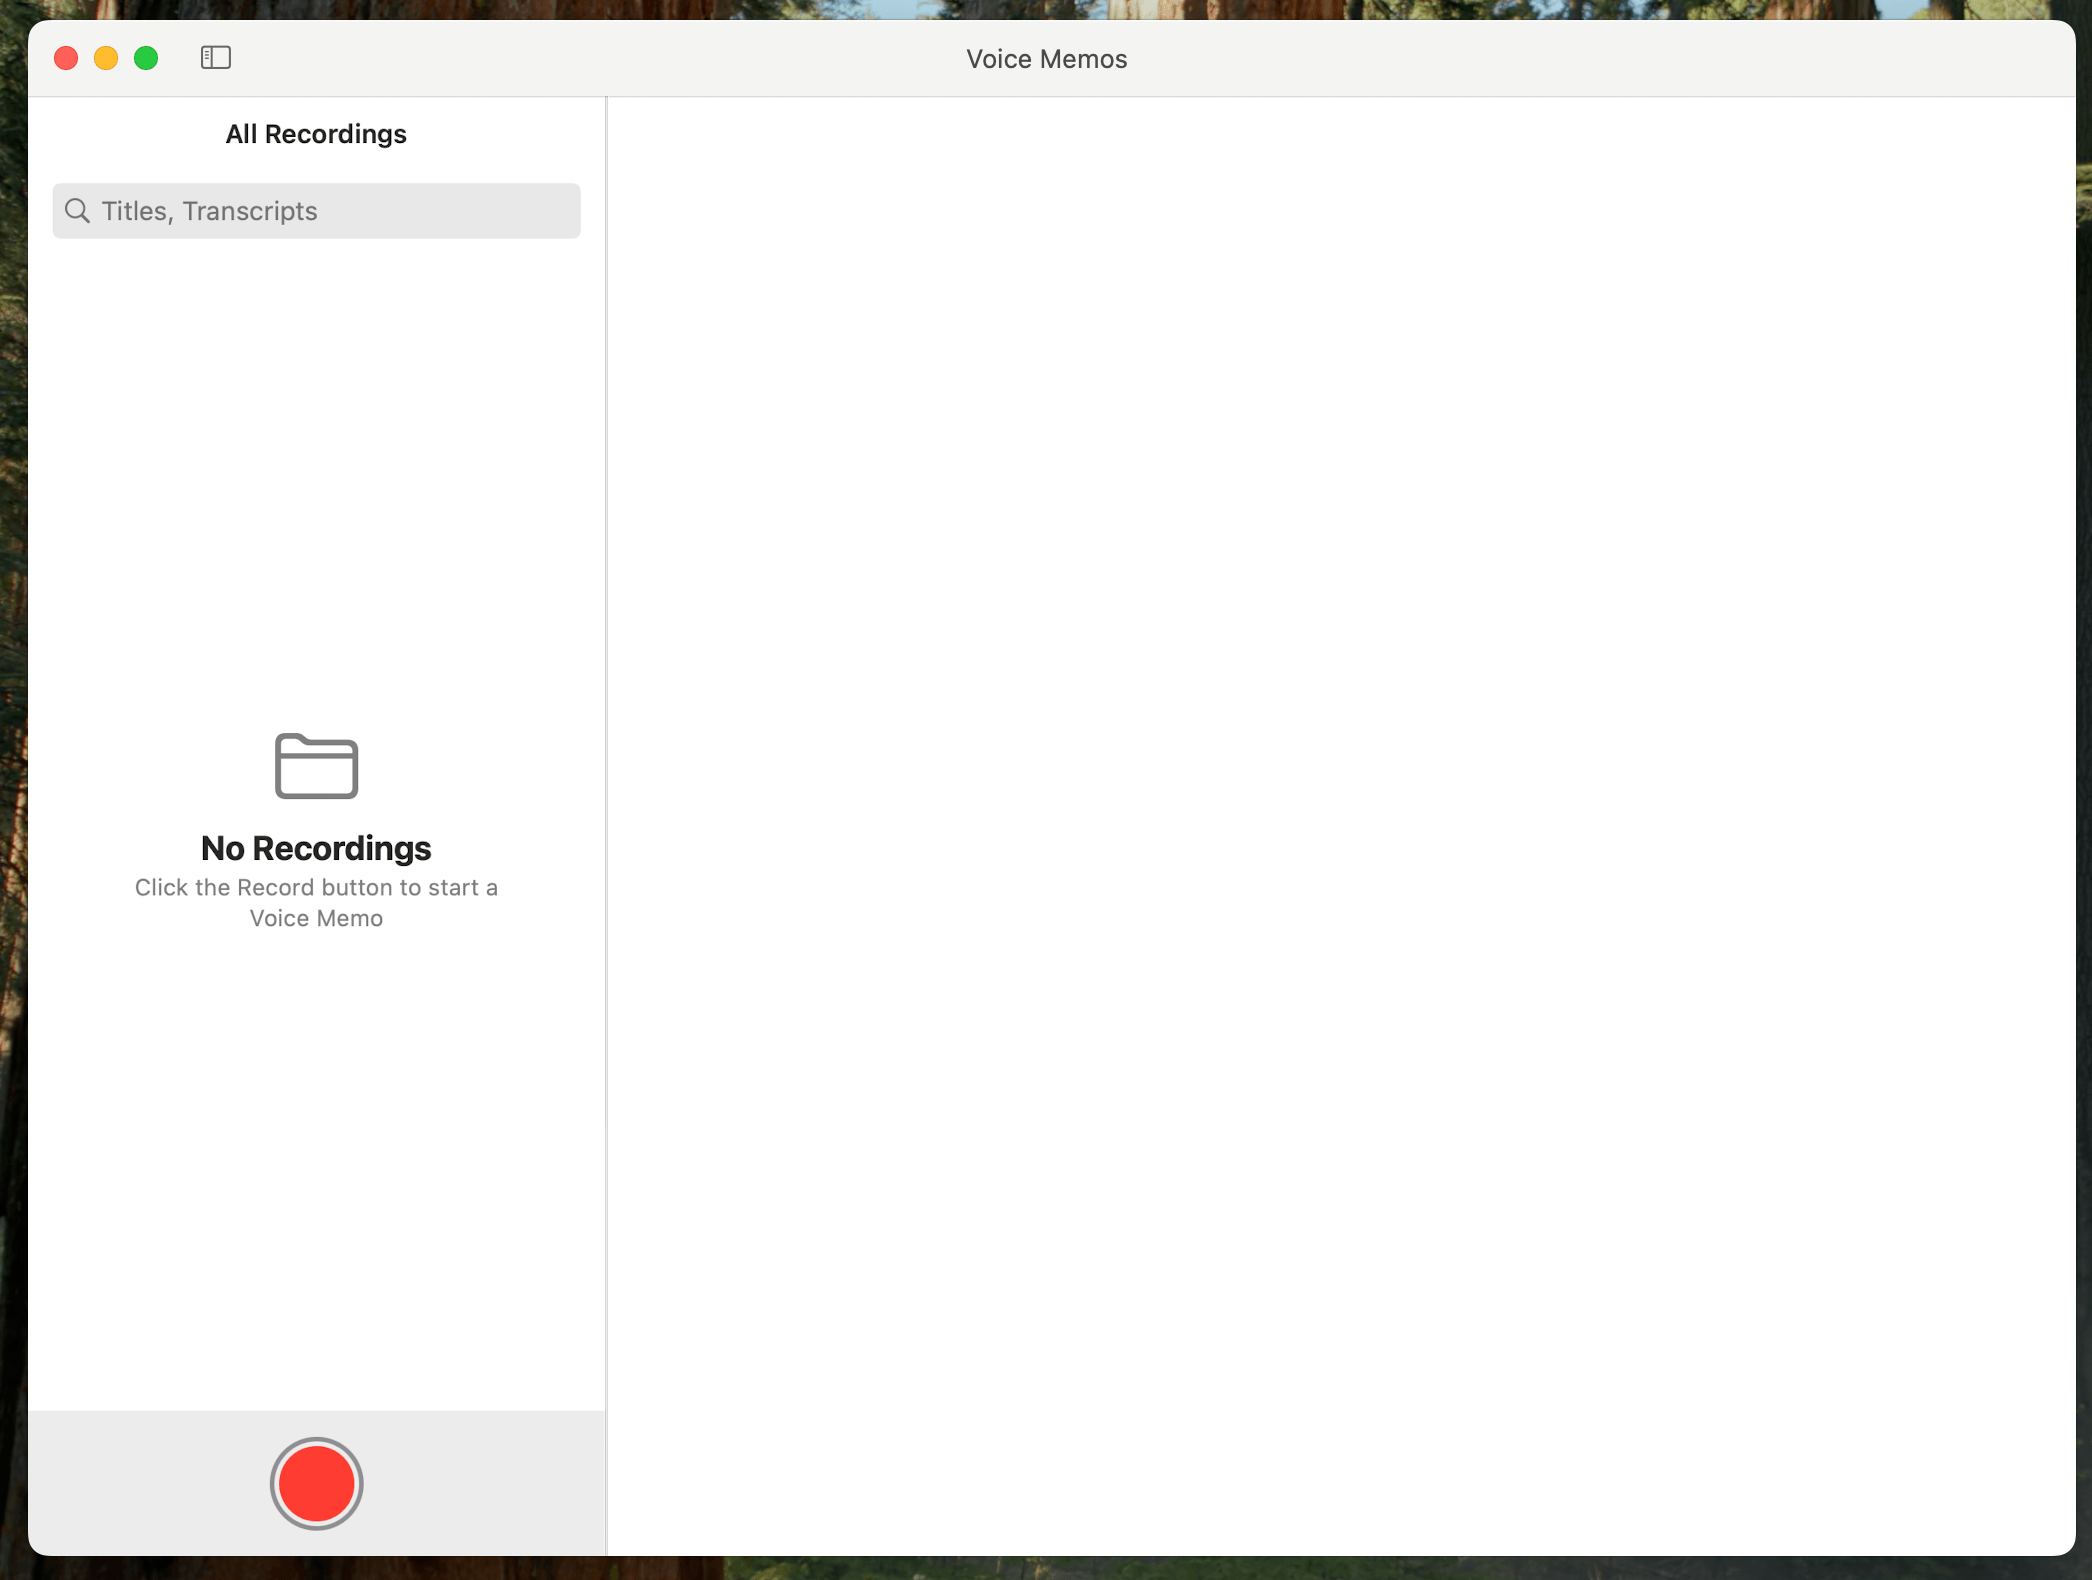
The easiest way to record audio on a MacBook is with the Voice Memos app. This is a great option for quick voice notes. It should also be an acceptable option for recording lectures at school or meetings at work.
Here’s how you can record Voice Memos on a MacBook:
- Open Voice Memos. You can find the app using the Launchpad, Spotlight search, or Siri.
- Click on the red Record button to start recording.
- You can click Pause if you need to take a break, then click Resume to continue recording.
- When done, click Done to save your recording.
Voice Memos saves your recordings and if you have iCloud enabled it syncs them across other Apple devices so you have access to the recordings wherever you are. This is the easiest option for recording your voice on Mac.
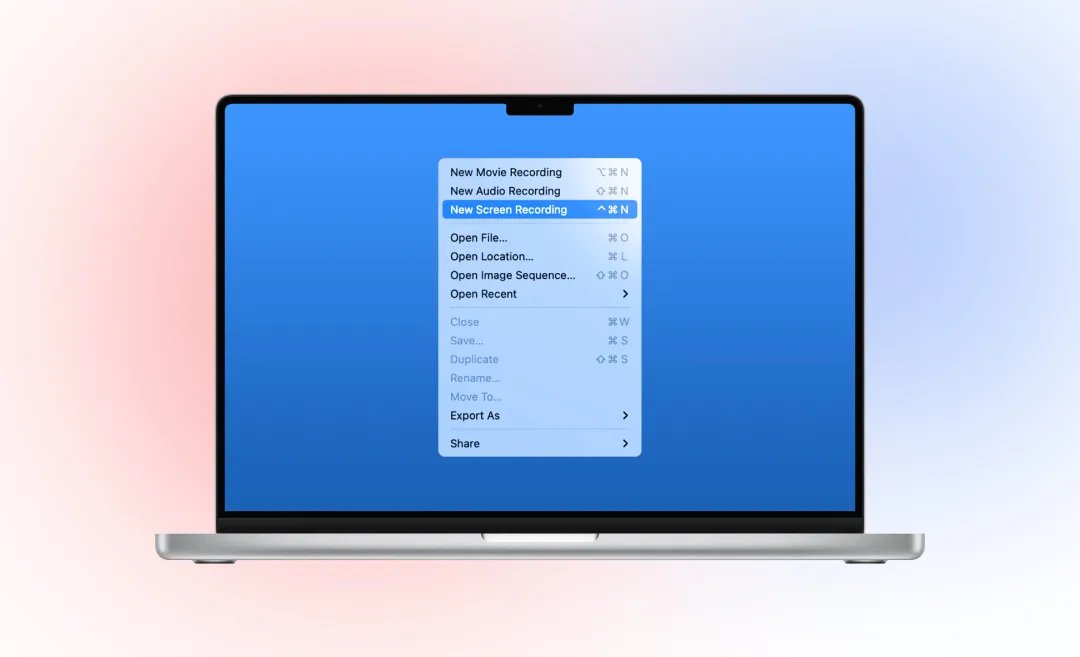
How to Record Audio with QuickTime Player
You can also record audio using the QuickTime Player on your MacBook.
Follow these steps to learn how:
- Open the QuickTime Player app from Launchpad, Spotlight search, or Siri.
- Right click on the QuickTime Player icon.
- Choose new audio recording.
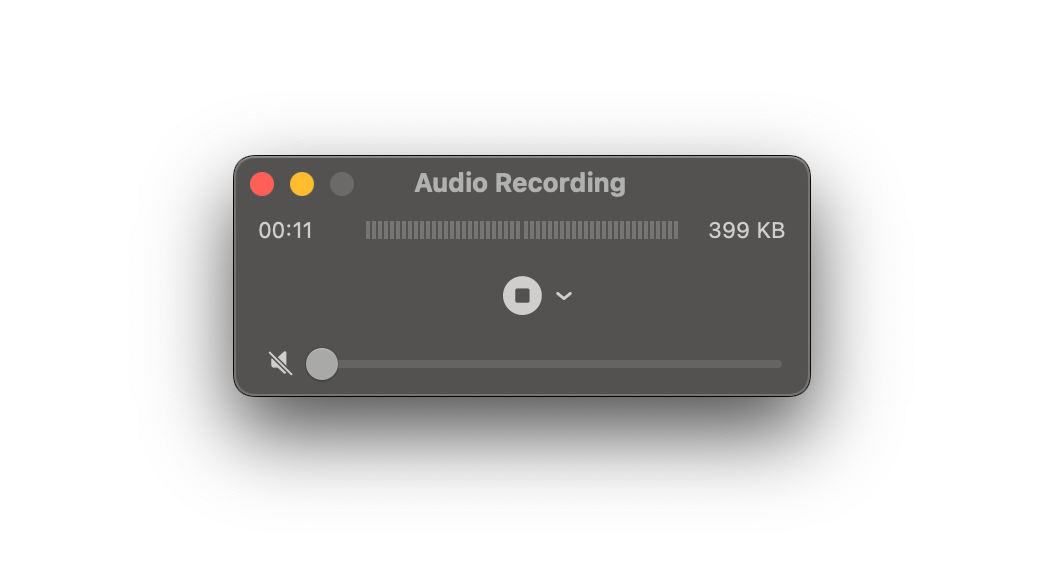
- Click the red button to start recording audio.
- Click the square stop button to stop recording.
- Name your file and choose a file location to save it.
Recording with Internal Audio
To record system sounds:
- Install an app like BlackHole to route system audio.
- Open the QuickTime Player.
- Go to File and choose New Audio Recording.
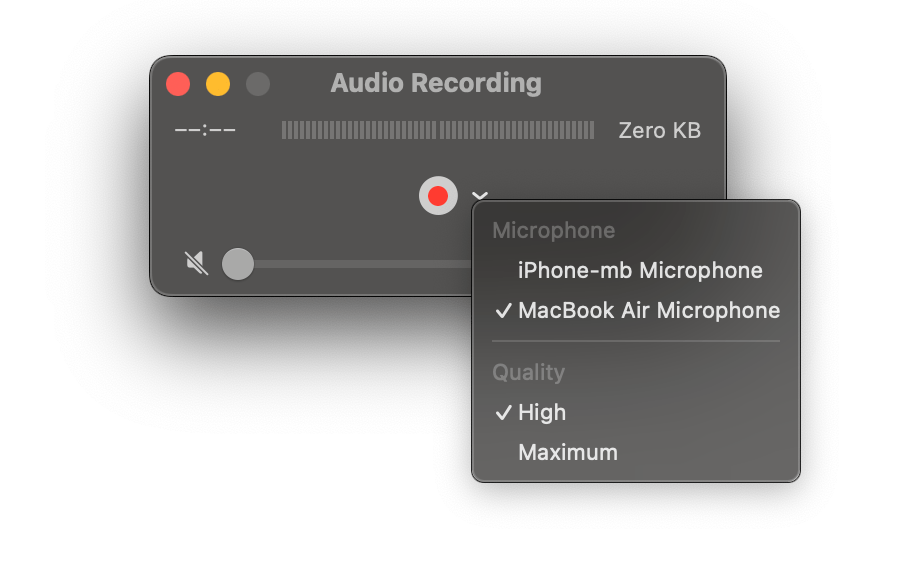
- Click the arrow next to the red record button and select BlackHole as the input.
- Click Record to start, then click Stop when you are finished.
- Save your recording.
Recording with External Mic
QuickTime also works with external microphones. To record with an external, the steps are very similar.
- Connect your external microphone to your MacBook.
- Open QuickTime Player and under “File” choose “New Audio Recording.”
- Select your microphone from the input options in the dropdown next to the record button.
- Click Record to start and the Stop button when you are finished.
- Remember to save your file.
Saving and Exporting Files
QuickTime saves recordings as .m4a files by default. Convert them to MP3 or other formats using GarageBand or another audio converter.
Voice memos uses “location-based naming” if it is enabled in settings, according to Apple’s Help Center.
How to Record Audio on MacBook with GarageBand
GarageBand is especially good for recording music. This app lets you record multiple tracks and edit your audio:
- Open GarageBand and create an Empty Project.
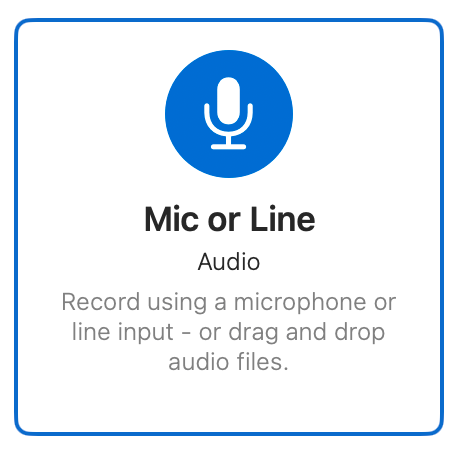
- Choose mic or line audio track to record from a microphone.
- Select your input device (built-in or external mic).
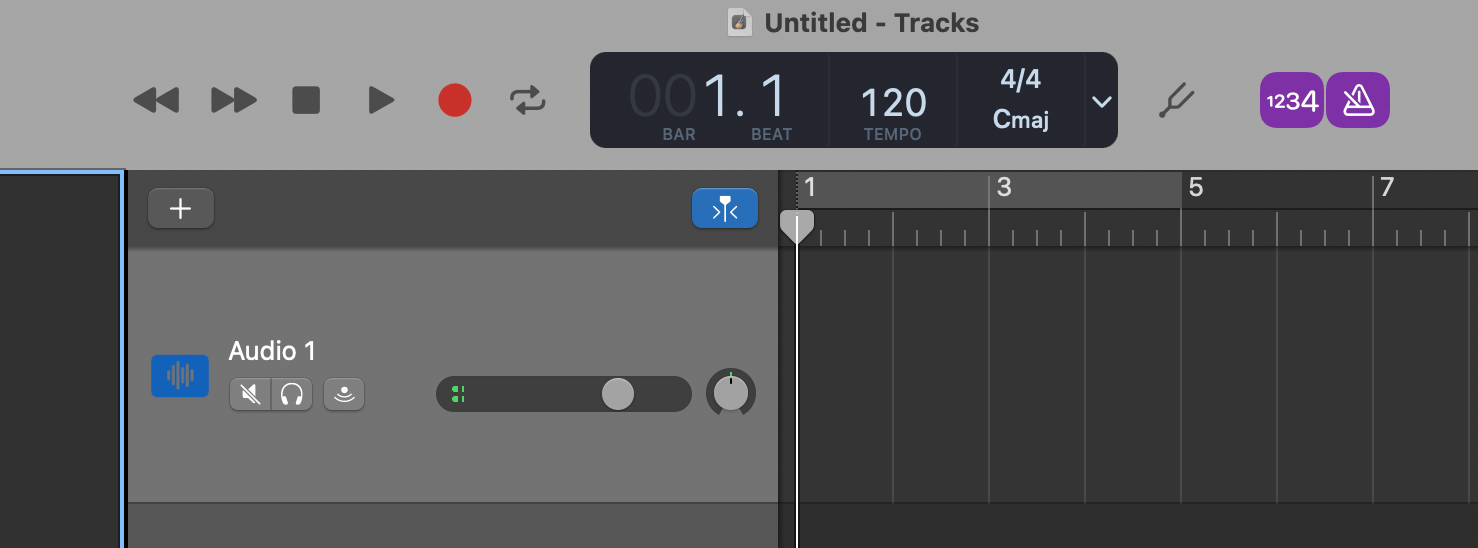
- Press Record in the control bar.
- Stop recording when done and export your file.
GarageBand is ideal for music, but you can also use it for podcasts, or projects where you need more control over your audio or need to edit your audio.
Tip: If you are wroking on podcasts, consider converting the audio recording of your podcast into text to reach more people with your podcast transcript!

Third-Party Tools for Recording Audio on MacBook
Other options for recording include using third-party apps.
- Audacity for example is free and lets you record from a microphone as well as system audio.
- Audio Hijack is paid but useful for capturing audio from apps, websites, or system sounds.
- Vmaker is commonly used for voice recordings or tutorials.
- Other apps like OBS Studio can record system audio and microphone audio at the same time.
- Summary AI is great for transcribing your recordings and converting audio to text.
Tips for Recording Audio
- How to reduce background noise: Find a quiet space, close apps that make noise, and use software or microphone setups that help reduce background sounds.
- What mic and format to use: Built-in microphones are fine for casual recordings. For music or podcasts, use a USB condenser mic or XLR mic with an interface if you can and have a bit of money to invest in higher end equipment. Save files in .m4a or .wav for the best quality.
Where to find your recordings?
- Voice Memos: Saved in the app and synced with iCloud.
- QuickTime: Files are saved where you choose to save them, usually in Downloads
- GarageBand: Export recordings to Music or Files.
- Third-party apps: Check the settings for where you save your recordings.
Organize your recordings in folders by date or by project to make it easier to find them.
Conclusion
Learning how to record audio on a MacBook is simple once you know your options. Voice Memos are great for recording quick notes, QuickTime Player is also a good option, GarageBand is useful for music recording, or choose third-party apps for internal audio. Make sure to choose the right microphone for your needs and pay attention to background noise for the best quality.
Combine recording with Summary AI to quickly convert your audio into text and save time on notes and transcripts you can search easily.